Bootstrap Checkbox Switch
Overview
From time to time the most basic items might just get extremely necessary-- especially the moment you get to need them. For instance how do your website visitors communicate with the pages you set up stating a simple Boolean action-- simply just yes or no referring to a number of the thoughts you need to ask, precisely how they do confirm the conditions or else line up a few of the practical selections they might possess. We often surpass this without paying much of an recognition to the element accountable for these kinds of activities yet the Bootstrap Checkbox Input is actually a pretty critical element-- one our forms can't in fact complete without.
Located in the most recent fourth edition of the Bootstrap system we are supplied with the
.form-check.form-check-label<div>.form-check.form-check-label<label><input>.form-check-inputThe way to apply the Bootstrap checkbox:
The checked state for these kinds of buttons is only updated with click event on the button. If you make use of an additional solution to improve the input-- e.g., with
<input type="reset">.active<label>
<div class="btn-group" data-toggle="buttons">
  <label class="btn btn-primary active">
    <input type="checkbox" checked autocomplete="off"> Checkbox 1 (pre-checked)
  </label>
  <label class="btn btn-primary">
    <input type="checkbox" autocomplete="off"> Checkbox 2
  </label>
  <label class="btn btn-primary">
    <input type="checkbox" autocomplete="off"> Checkbox 3
  </label>
</div>
Once in a while we want the checkboxes to take place within our forms without the customer truly having the ability to get some activity clicking on them-- that is actually where exactly the disabled option arrives in.
Just to disable effectively a checkbox in Bootstrap 4 employing the standard HTML attribute
disabledIf you really like the concept and clearly really want to accomplish this you should designate the
.disabled.form-checkA different example
Any time you are using checkboxes, wrap them in a
<label>.custom-control.custom-checkboxUtilize
.custom-control-input<input>Also utilize two
<span>.custom-control-indicator.custom-control-description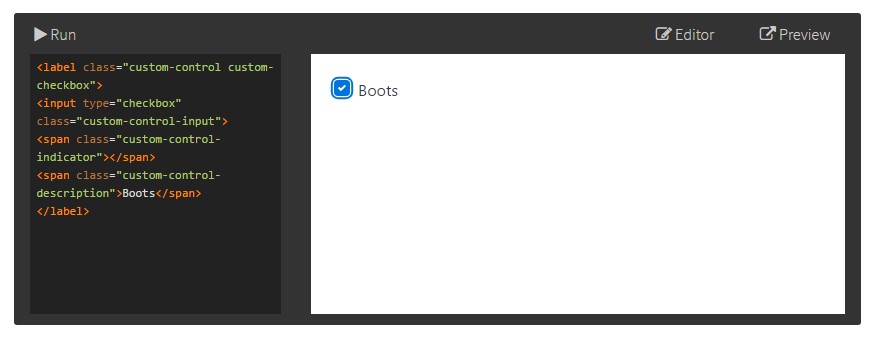
<label class="custom-control custom-checkbox">
<input type="checkbox" class="custom-control-input">
<span class="custom-control-indicator"></span>
<span class="custom-control-description">Boots</span>
</label>
Bootstrap Checkbox Toggle forms
Default checkboxes and radios are developed upon with the aid of
.form-checkThe disabled class will also light up the message coloration to help specify the input's state.
A brand new aspect for the Bootstrap edition 4 system is the launch of the so called custom made form components. These are the identical elements we are known within usefulness but designated a lot more interesting and also in the Bootstrap way. With them you are able to bring in special excitement and personality to your material by simply just appointing a number of extra classes to the controls you feature in your forms.
If you want to use custom made checkboxes wrap them inside a
<label>.custom-control.custom-checkbox<input>.custom-control-input<span>.custom-control-indicator.custom-control-descriptionConclusions
That's nearly everything you have to execute in order to place a checkbox feature within your Bootstrap 4 powered websites and add in some custom made flavor to it putting in it a fancy looks. Right now all you have to do is repeat the practice till you've checked every one of the checkboxes needed are readily on the webpage.
Take a look at a few video training about Bootstrap checkbox
Related topics:
Bootstrap checkbox main documentation

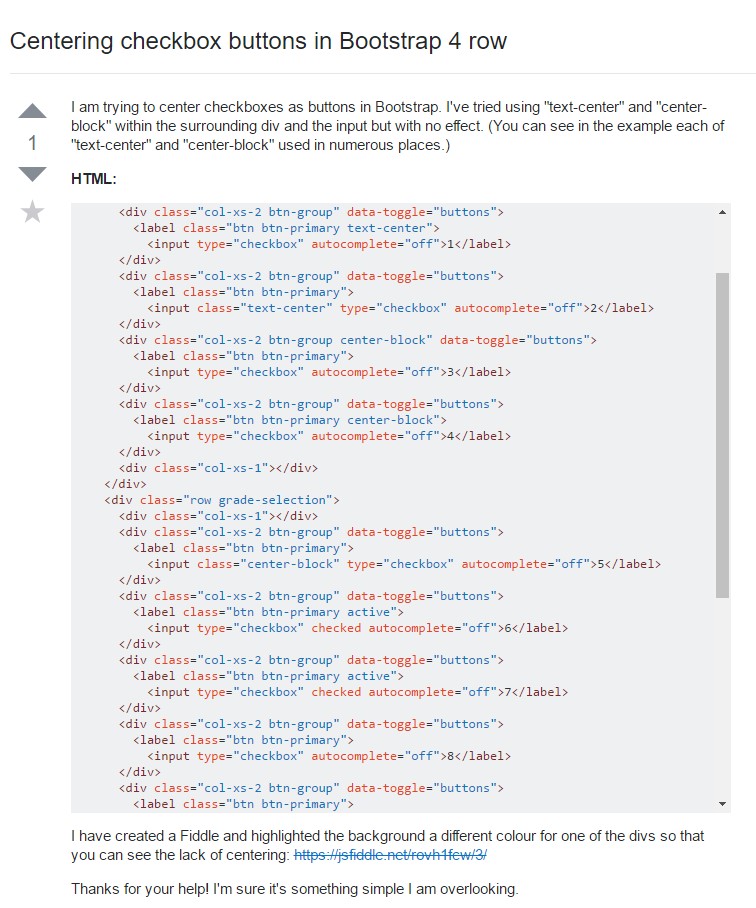
Centering checkbox buttons in Bootstrap 4 row
Make checkbox always visible in Bootstrap 4
